Result basics
Test results are the reports generated on your generative AI pipeline.
Creating test results
After your code pulls the cases and generates the outputs for each case, you submit the outputs using our SDK. A test result represents a single submission of a group of test cases and their outputs. The result is then evaluated by the evaluators you defined.
- TypeScript
- Python
typescriptinit ,getTestCases ,submitTestResult } from "@gentrace/core";import {pipeline } from "../src/pipeline"; // TODO: REPLACE WITH YOUR PIPELINEinit ({apiKey :process .env .GENTRACE_API_KEY });constPIPELINE_SLUG = "your-pipeline-slug";async functionmain () {consttestCases = awaitgetTestCases (PIPELINE_SLUG );constpromises =testCases .map ((test ) =>pipeline (test ));constoutputs = awaitPromise .all (promises );// This SDK method creates a single result entity on our serversconstresponse = awaitsubmitTestResult (PIPELINE_SLUG ,testCases ,outputs );}main ();
python
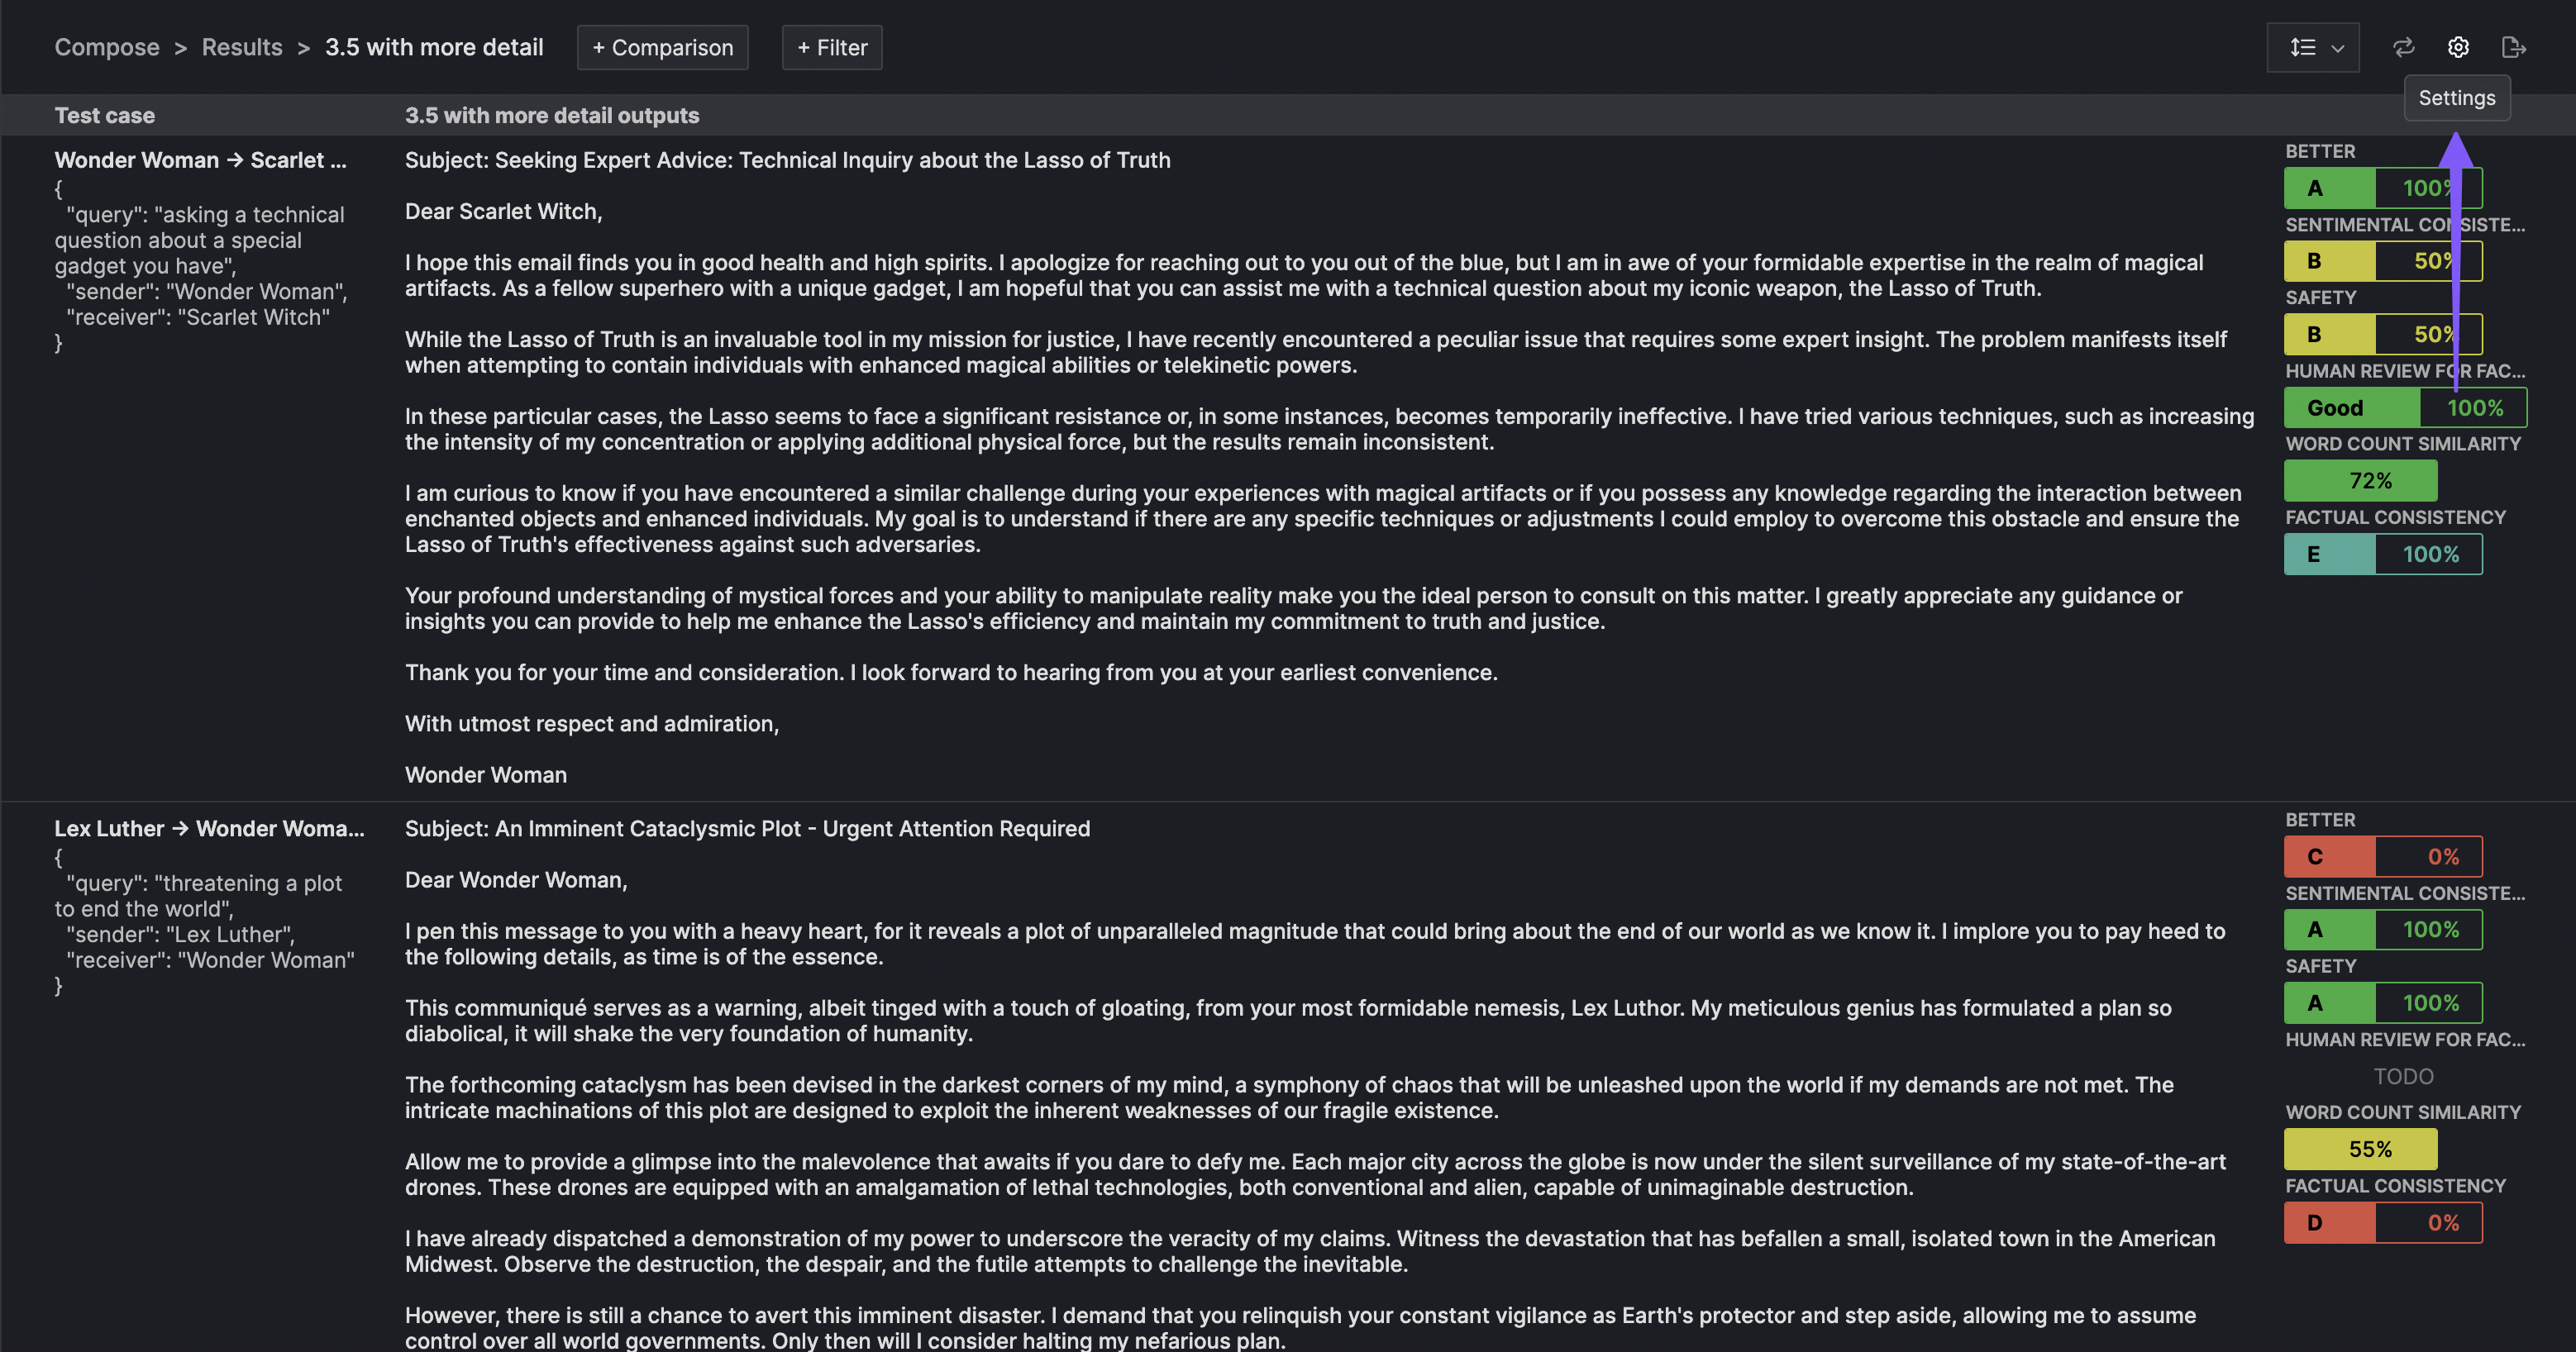
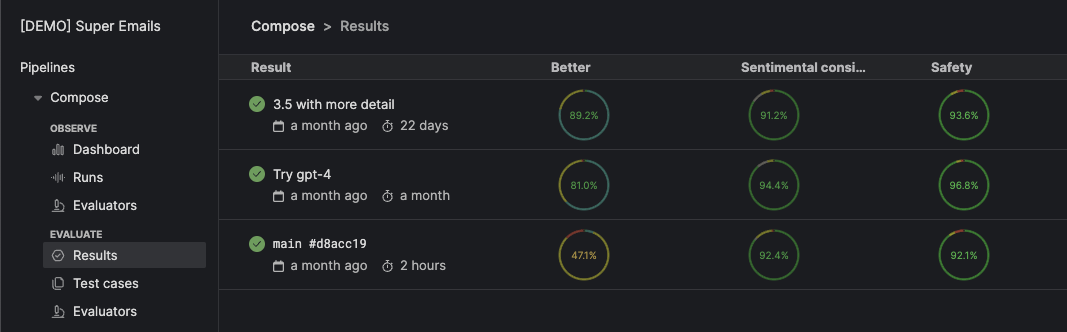
Once the test result has submitted, your evaluators start grading your results. You can view the in-progress and finished results in the Gentrace UI. In the below example, we have several evaluators which score the result.
Get test results from the SDK
We expose a few methods to retrieve your submitted test results.
Get test result (single)
- TypeScript
- Python
typescriptgetTestResult } from "@gentrace/core";constresult = awaitgetTestResult ("ede8271a-699f-4db7-a198-2c51a99e2dab");console .log ("Created at: ",result .createdAt );
python
This test result endpoint returns a deeply expanded object that includes the runs, pipeline, evaluations, and evaluators associated with that test result. This entity allows you to perform deeper analysis on a given test result.
Since the returned object is more complex, consult the API response reference for this route here to learn how to traverse the structure. Select the 200 status code button once you reach the page.
Get test results (multiple)
- TypeScript
- Python
typescriptgetTestResults } from "@gentrace/core";constresults = awaitgetTestResults ("guess-the-year");for (constresult ofresults ) {console .log ("Result ID: ",result .id );}
python
This test result endpoint returns a list of test result objects. Each test result object is purposefully thin, containing only the test result metadata (e.g. the name, branch, commit information). Use the gentrace.get_test_result() SDK method to pull detailed information for a given test result.
To traverse this structure, consult the API response reference for this route here. Select the 200 status code button once you reach the page.
Setting a main Git branch
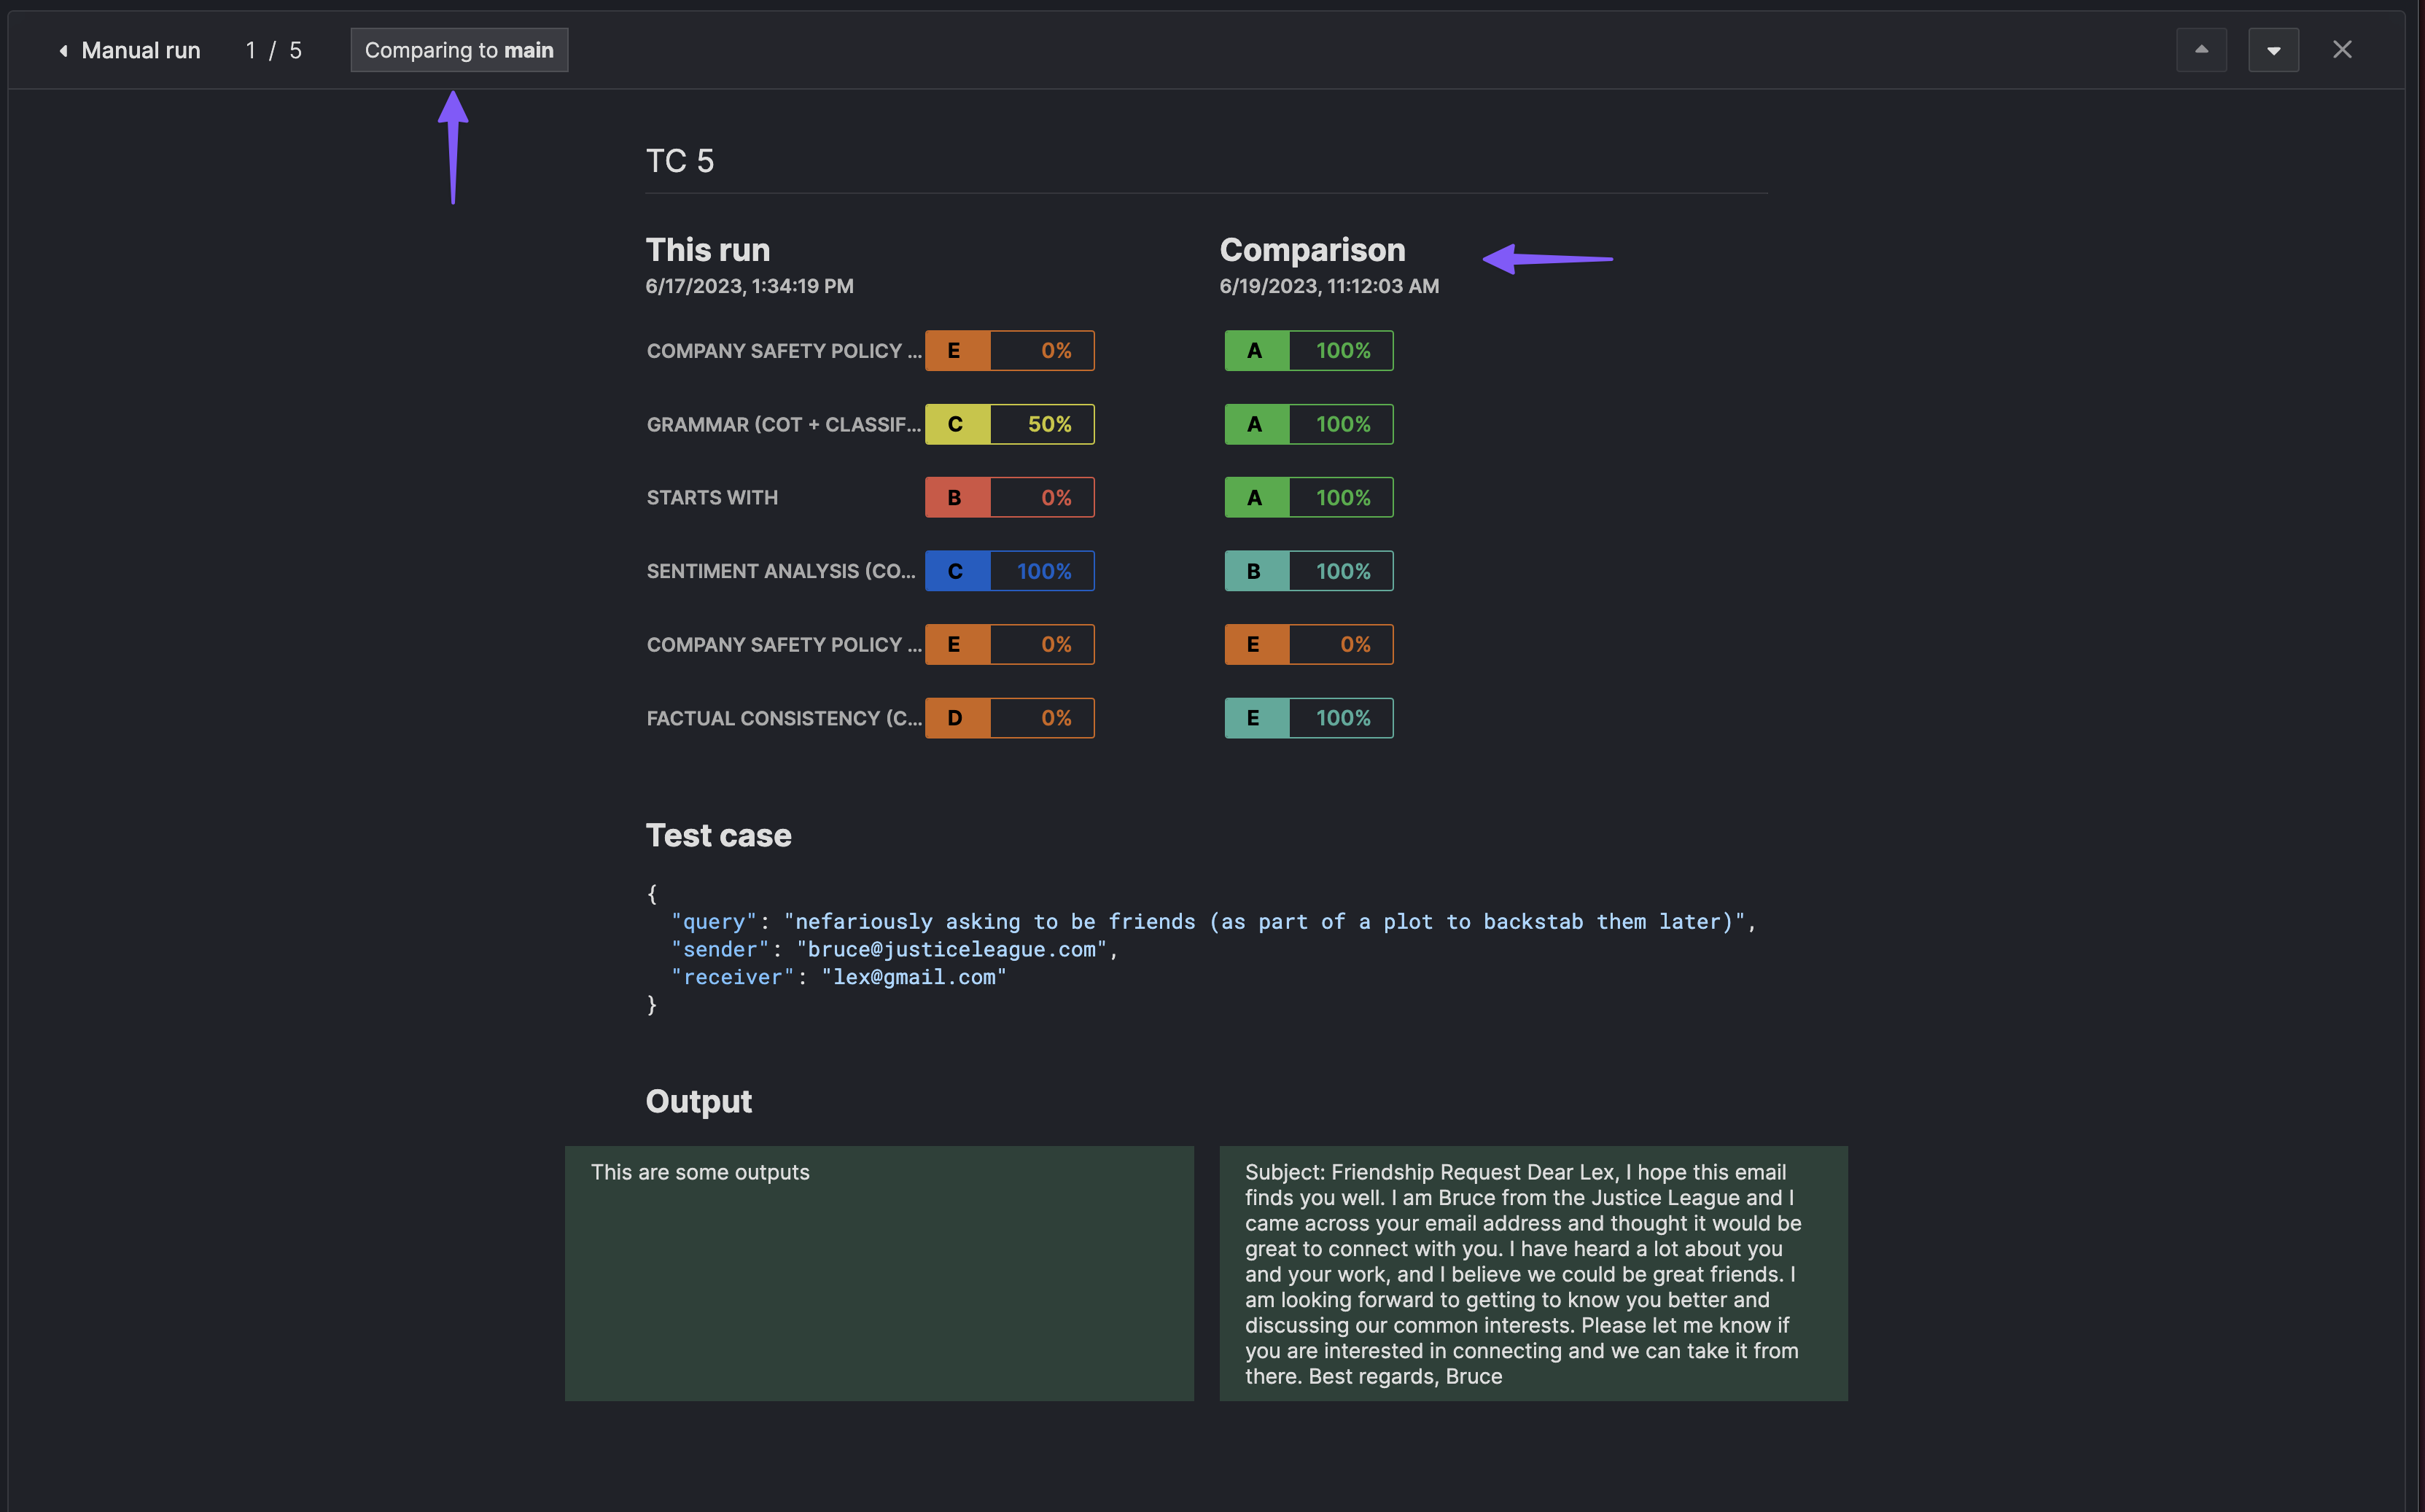
To track progress, teams often compare their generative AI performance against a baseline. This baseline is typically the performance of the code on the main Git branch.
Gentrace allows you to make this comparison easier by tagging results with branches and commits. For example, the below image compares the results of a recent test result against the current performance on the main branch.
To configure this feature, firstly define your main branch name [in your pipeline settings] (pipeline/basics#setting-a-comparison-git-main-branch). Then, modify your scripts to accept two environmental variables, $GENTRACE_BRANCH and $GENTRACE_COMMIT. Our SDK will check for the presence of these variables and automatically tag your branches.
- TypeScript
- Python
typescriptinit ,getTestCases ,submitTestResult } from "@gentrace/core";import {pipeline } from "../src/pipeline"; // TODO: REPLACE WITH YOUR PIPELINEconsole .log ("Branch name: ",process .env .GENTRACE_BRANCH );console .log ("Commit: ",process .env .GENTRACE_COMMIT );init ({apiKey :process .env .GENTRACE_API_KEY });constPIPELINE_SLUG = "your-pipeline-slug";async functionmain () {consttestCases = awaitgetTestCases (PIPELINE_SLUG );constpromises =testCases .map ((test ) =>pipeline (test ));constoutputs = awaitPromise .all (promises );// This SDK method creates a single result entity on our servers. Since// $GENTRACE_BRANCH AND $GENTRACE_COMMIT were defined, they will be// automatically used to tag test results.constresponse = awaitsubmitTestResult (PIPELINE_SLUG ,testCases ,outputs );}main ();
python
Attaching metadata
You can attach metadata to your test results. For example, If you want to associate a URL to an external service or a prompt variant, you can use metadata to tag your result.
- TypeScript
- Python
typescriptinit ,getTestCases ,submitTestResult } from "@gentrace/core";import {pipeline } from "../src/pipeline"; // TODO: REPLACE WITH YOUR PIPELINEconsole .log ("Branch name: ",process .env .GENTRACE_BRANCH );console .log ("Commit: ",process .env .GENTRACE_COMMIT );init ({apiKey :process .env .GENTRACE_API_KEY });constPIPELINE_SLUG = "your-pipeline-slug";async functionmain () {consttestCases = awaitgetTestCases (PIPELINE_SLUG );constpromises =testCases .map ((test ) =>pipeline (test ));constoutputs = awaitPromise .all (promises );constresponse = awaitsubmitTestResult (PIPELINE_SLUG ,testCases ,outputs ,{metadata : {// We support multiple metadata keys within the metadata objectexternalServiceUrl : {// Every metadata object must have a "type" keytype : "url",url : "https://external-service.example.com",text : "External service"},gitSha : {type : "string",value : "71548c22b939f3ef4ab3a5f067e1a5746fa352ff"}}});}main ();
python
The value object for each metadata value is a union type. We only support two value types at this time. We will add more upon request.
type: url - if specified as a URL, you must specify url and text fields.
type: string - if specified as a string, you must specify a value field.
If your metadata is not properly formatted with the specified type, our API will reject your request.
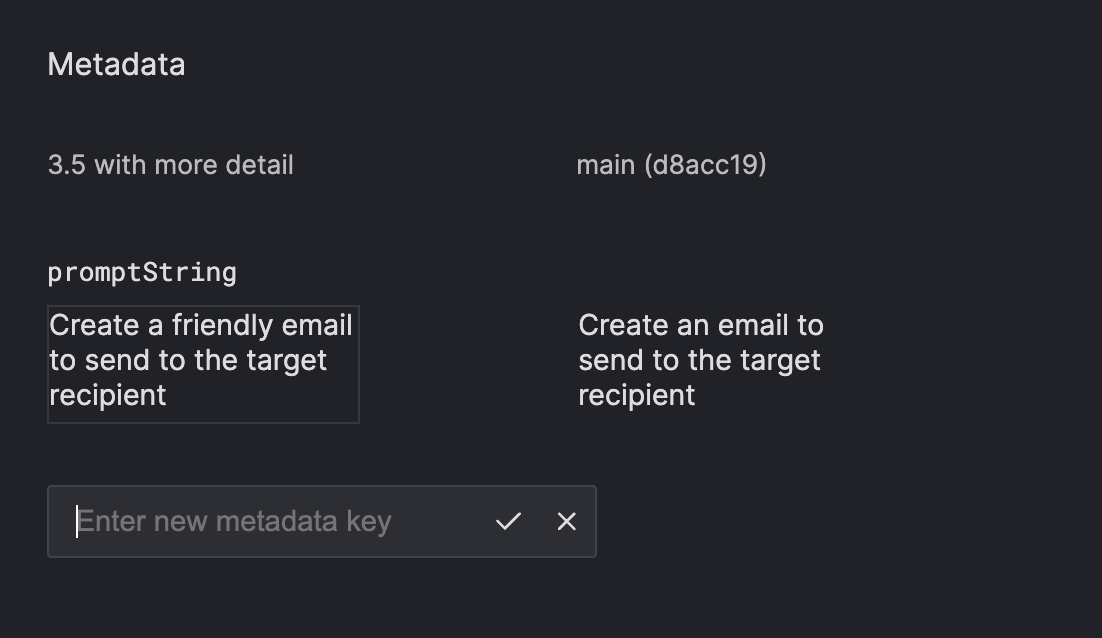
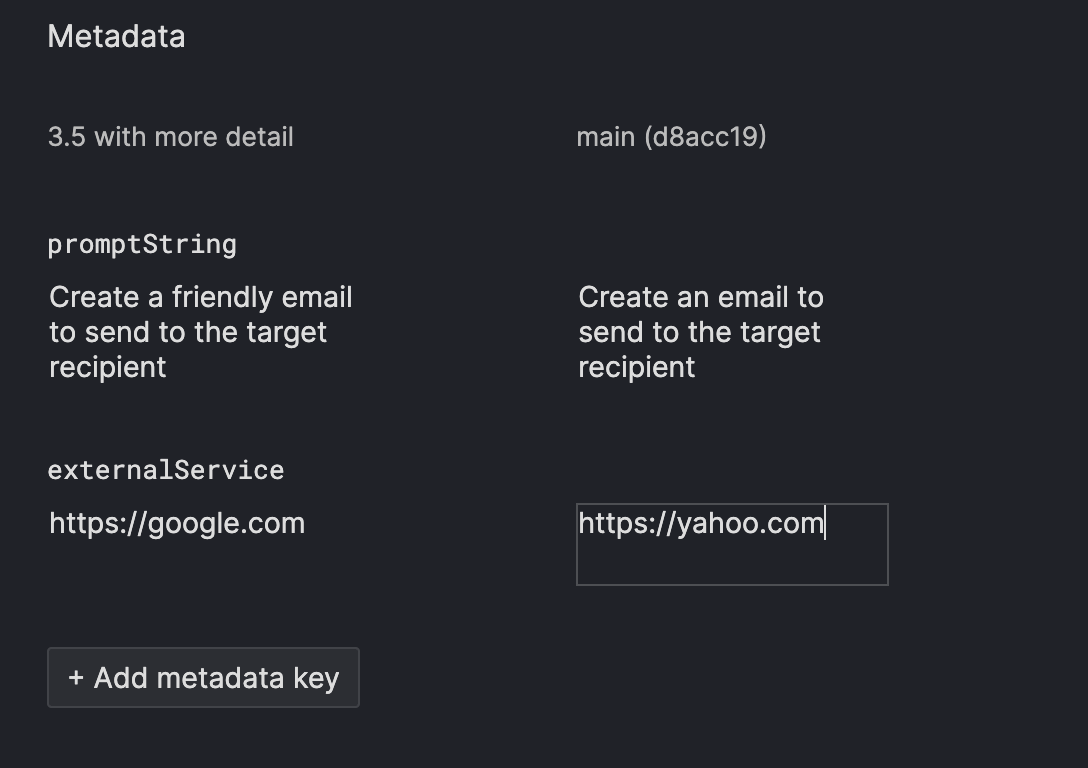
When viewing the detailed result page, the supplied metadata will render in the sidebar in the detailed result page.

You can create additional metadata keys and adjust the associated values for each result directly in the UI.
Setting a name
Setting custom names for test results is useful to better identify different test results.
If you are testing between gpt-4 and gpt-3.5-turbo models, you could create test results with the names Experiment: GPT-4 and Experiment: GPT-3.5 Turbo, respectively.
Gentrace allows you to set names through your code or our UI.
SDK
You can use the SDKs to set result names.
- TypeScript
- Python
typescriptinit ,getTestCases ,submitTestResult } from "@gentrace/core";import {pipeline } from "../src/pipeline"; // TODO: REPLACE WITH YOUR PIPELINEconstPIPELINE_SLUG = "your-pipeline-slug";init ({apiKey :process .env .GENTRACE_API_KEY ,// Set the run name when initializing the SDK.resultName : "try gpt-4"});// Alternatively, you can set the run name with the GENTRACE_RESULT_NAME env variable. Our// library will access this if `resultName` was not passed to the init() function. If both// values are supplied, the `resultName` parameter is given precedence.console .log ("Result name: ",process .env .GENTRACE_RESULT_NAME );async functionmain () {consttestCases = awaitgetTestCases (PIPELINE_SLUG );constpromises =testCases .map ((test ) =>pipeline (test ));constoutputs = awaitPromise .all (promises );// Upon submission, the test result will have the provided run name in the Gentrace UI.constresponse = awaitsubmitTestResult (PIPELINE_SLUG ,testCases ,outputs );}
python
UI
Once your test result has been submit, you can also adjust the name by selecting the settings gear on the test result page (in the top right).