SCIM
Gentrace supports SCIM for user provisioning. We support any SCIM provider via a custom configuration, and test for Okta in particular.Setup
Generally, SCIM setup is quite simple. After setting up SSO, navigate to security settings and create a SCIM key.
Setup with Okta
Step 1: Create SCIM key
After setting up SSO, navigate to security settings and create a SCIM key.Step 2: Create SAML application in Okta (SAML will not be used)
Create a new SAML application in Okta.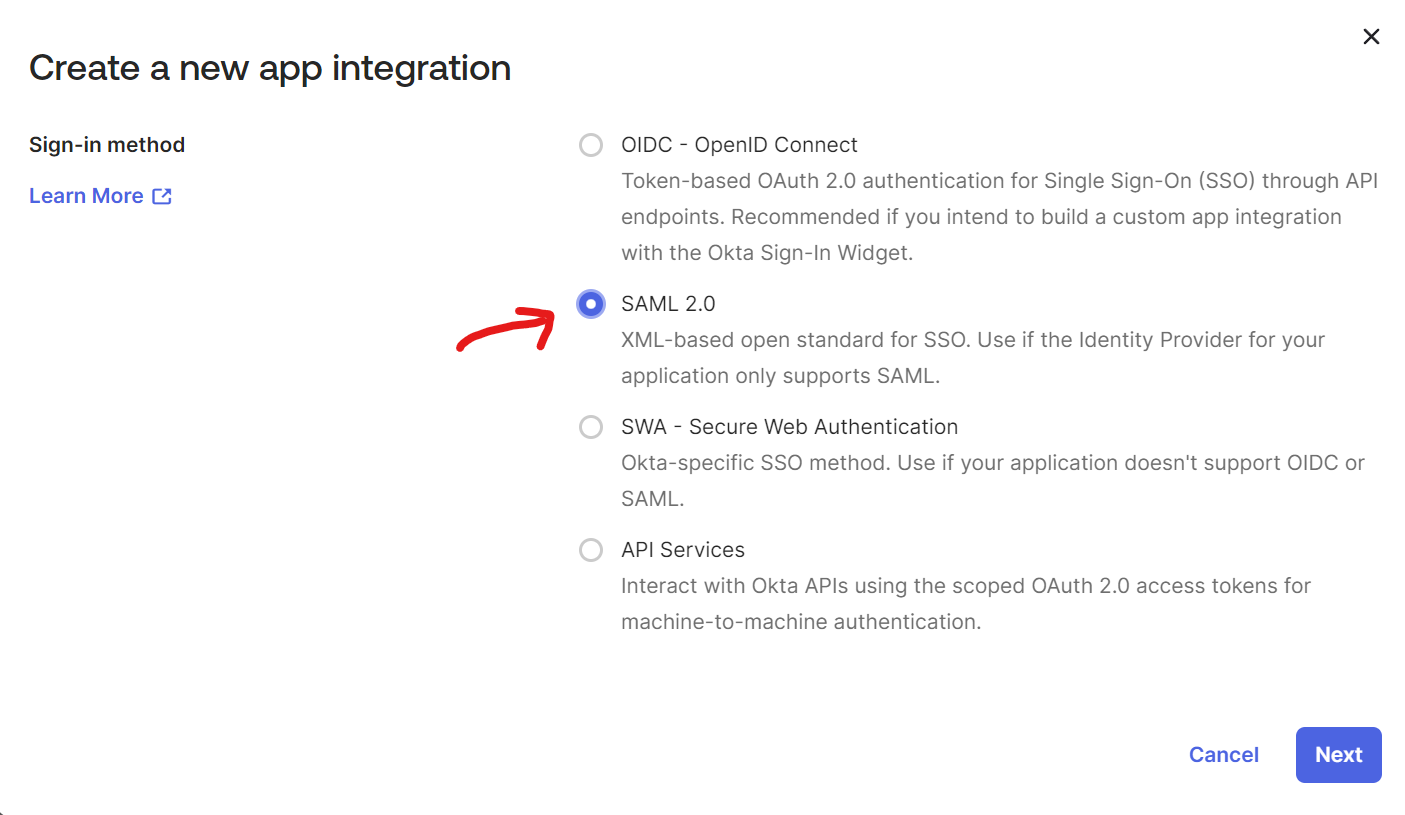
We won’t actually use the SAML settings; this just allows us to get to SCIM setup.The only setting that matters here is “Application username”
- Single sign-on URL:
https://gentrace.ai(not used) - Audience URI:
test(not used) - Application username: Email (actually matters)

Step 3: Enable and configure SCIM
In your new Okta app, under “General,” press “Edit” and then check the box for “Enable SCIM provisioning.” Press “Save.”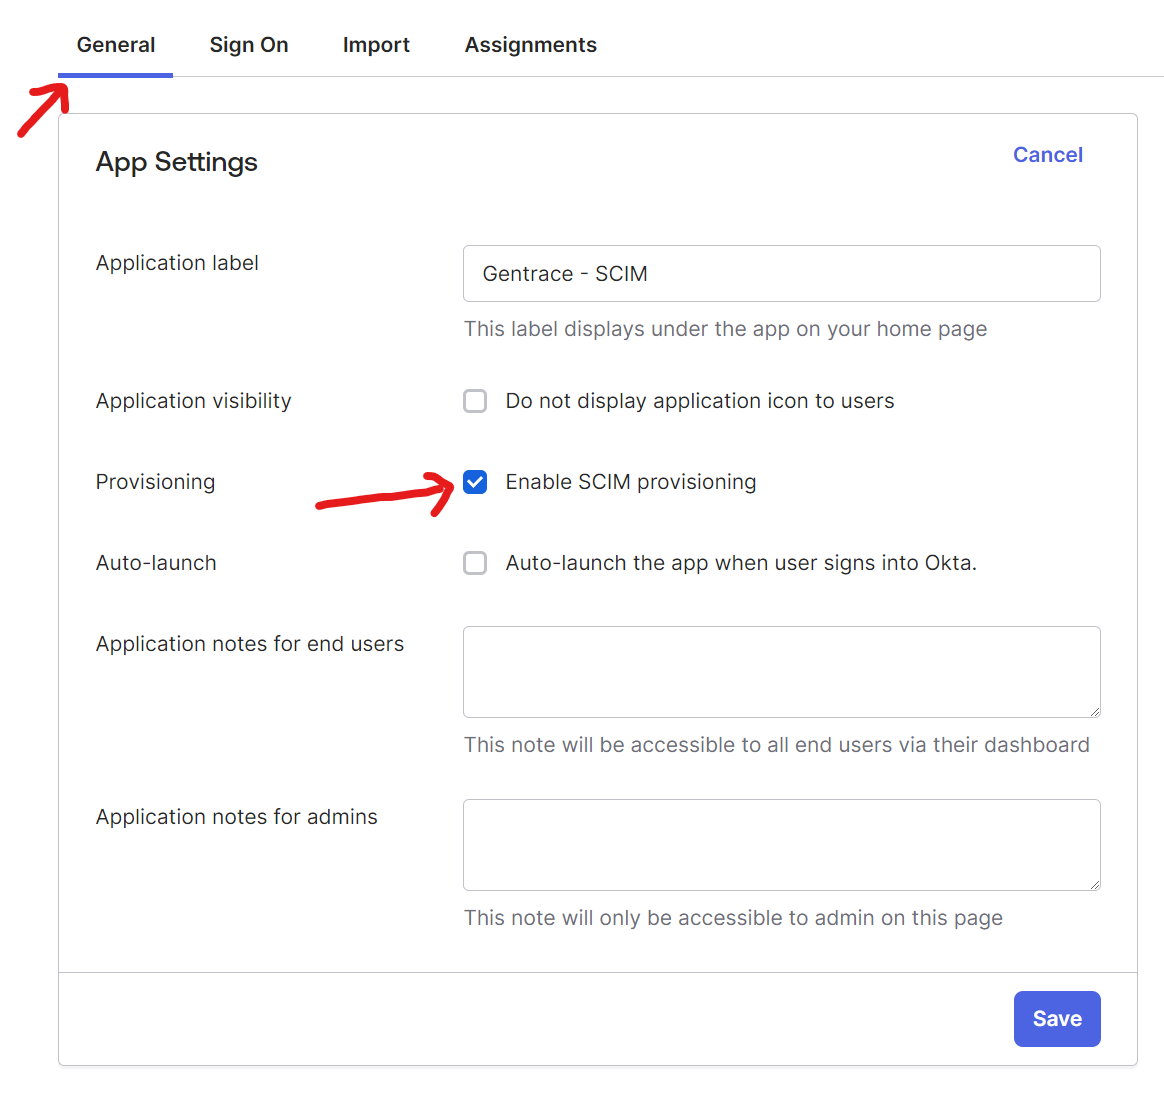
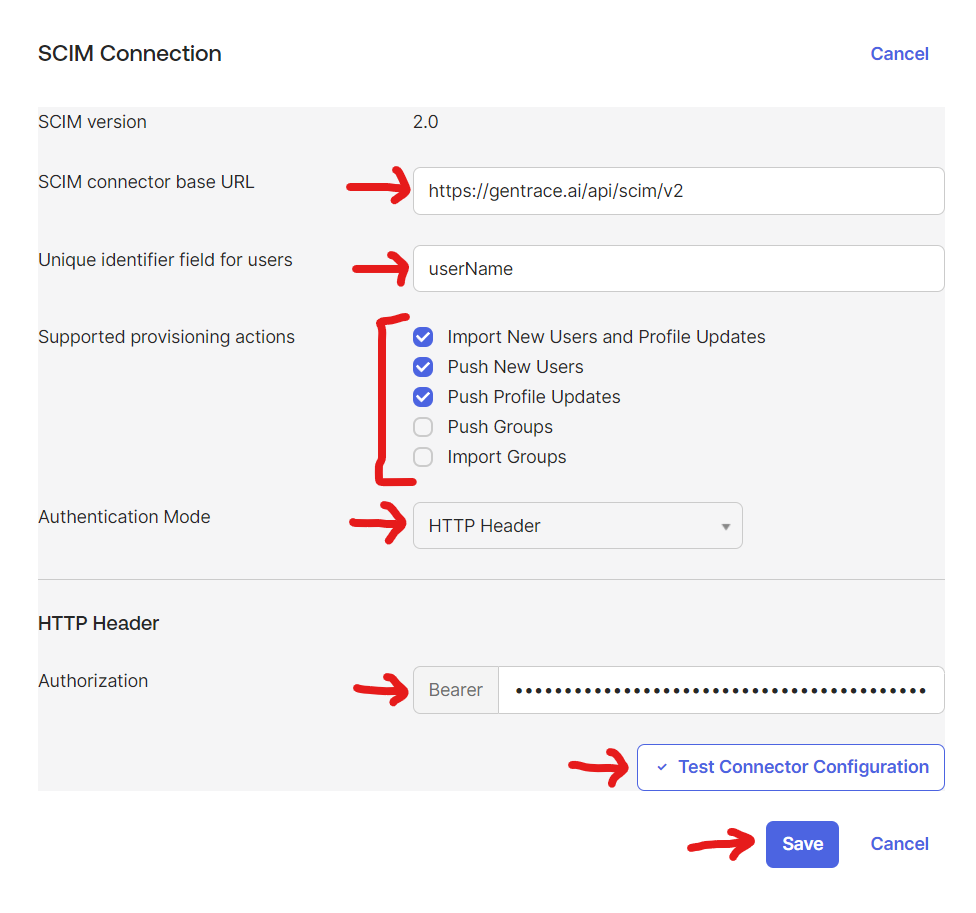
- SCIM connector base URL:
https://gentrace.ai/api/scim/v2 - Unique identifier field for user:
userName - Supported provisioning actions: Import New Users and Profile Updates, Push New Users, Push Profile Updates
- Authentication Mode: HTTP Header
- Authorization (Bearer): Use the SCIM key from Gentrace
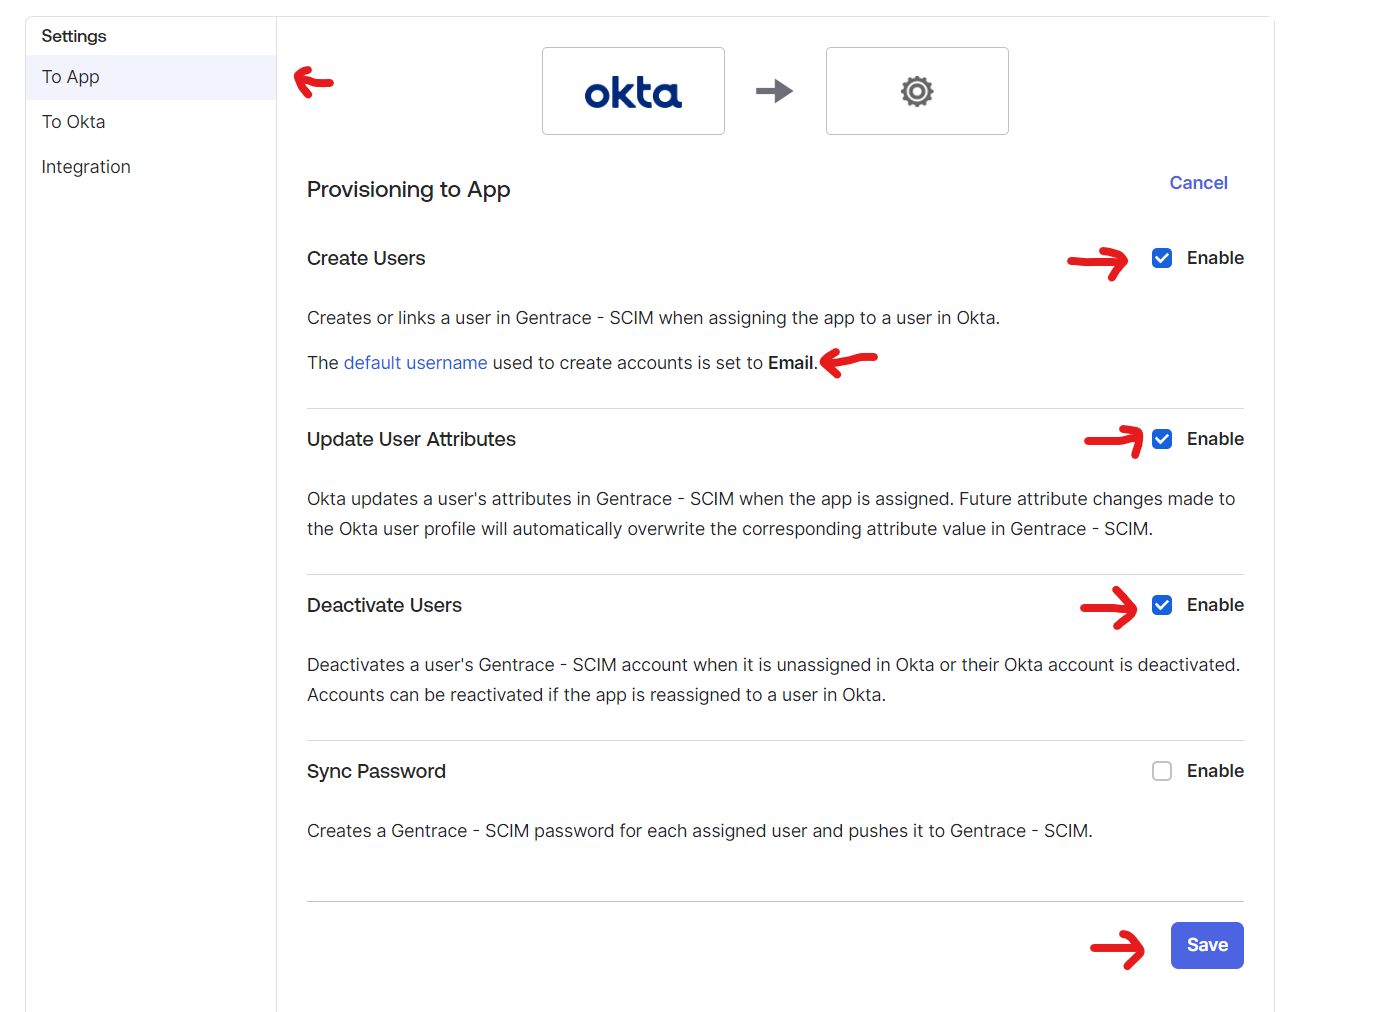
Step 4: Configure SCIM “To App” settings
Under “To App”, press “Edit”, and change the following settings.- Create Users: Enable, and ensure the “default username” is set to “Email.”
- Update User Attributes: Enable.
- Deactivate Users: Enable.
- Sync Password: do not enable