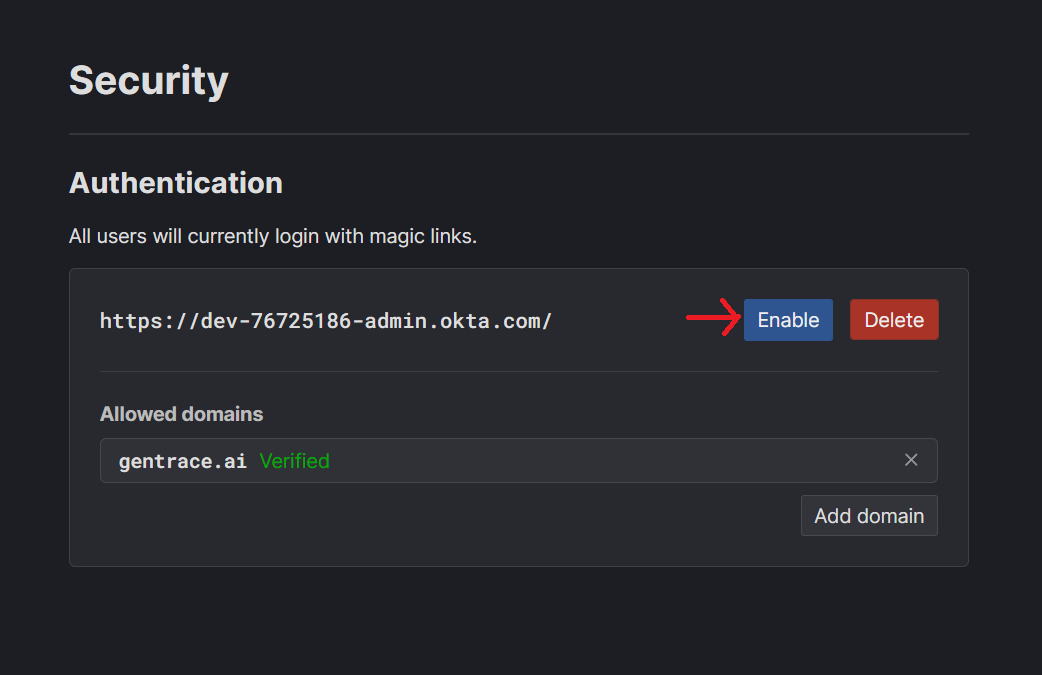
Single sign-on (SSO)
Gentrace supports single sign-on (SSO) via OpenID Connect (OIDC). We support any OIDC provider via a custom configuration, and test for Okta in particular.Security notes
When SSO enabled is enabled, all new logins and new invites for users on matching domains will need to login via SSO. This means that:- Existing sessions will not be required to re-login (for continuity). Existing users will be required to SSO the next time they need to login.
- Users on non-matching domains will not be required to login via SSO and will still login via email
- New users (and existing users who are not in the organization) on matching domains will be required to SSO when they accept an invite to the organization
Setup
Step 1: Connect Gentrace to your OIDC Provider
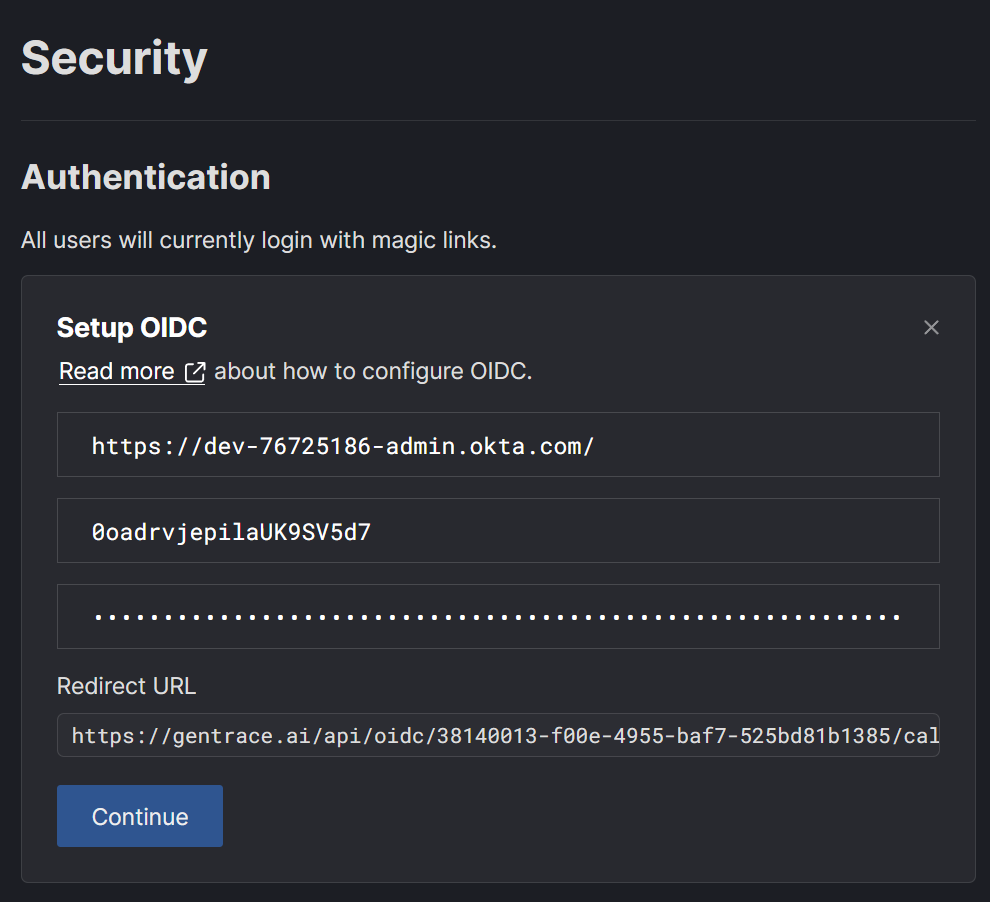
Navigate to security settings and press “Configure OIDC”. Configure the integration in your provider. You’ll need to pass the Redirect URL from Gentrace to your SSO provider. For example, here’s how this looks in Okta: Press Create: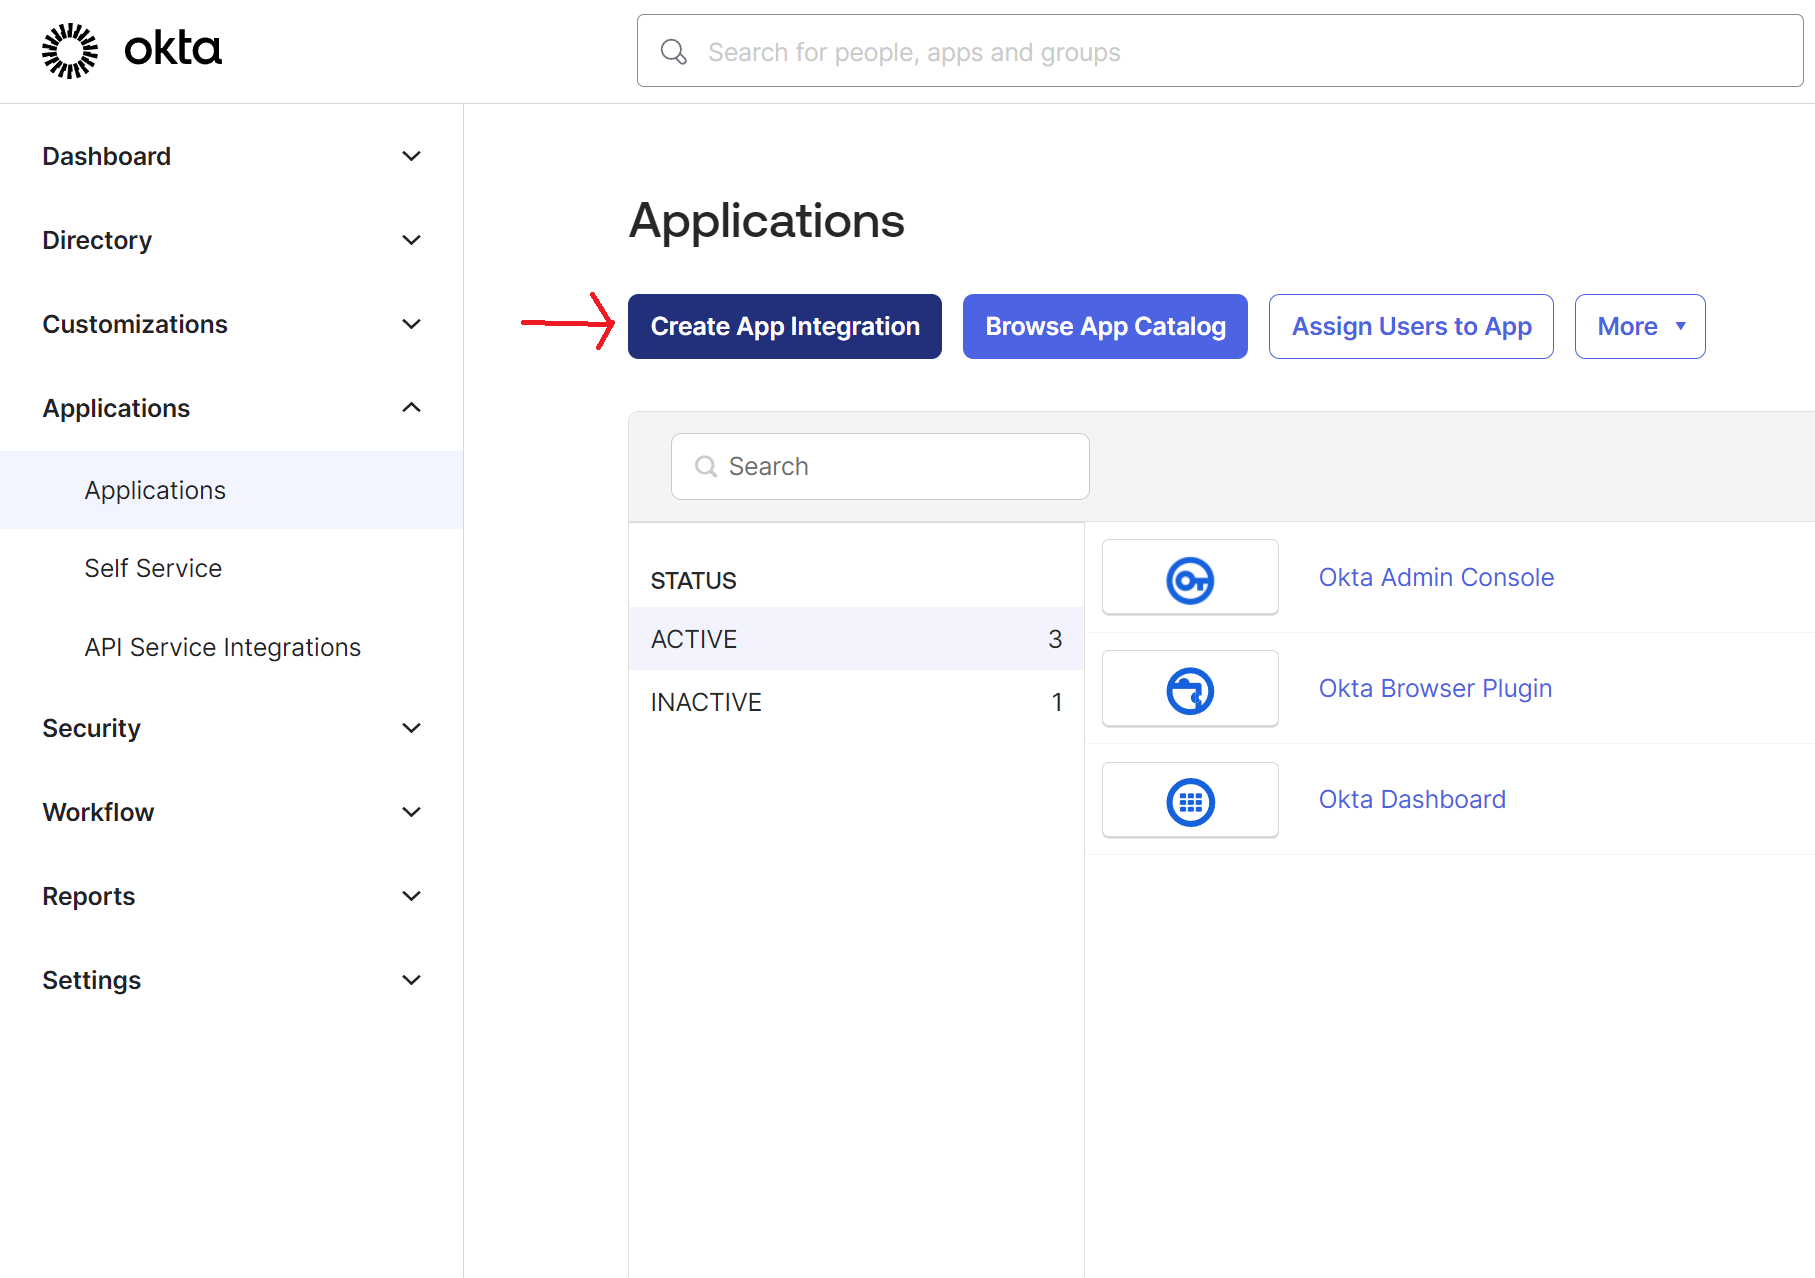
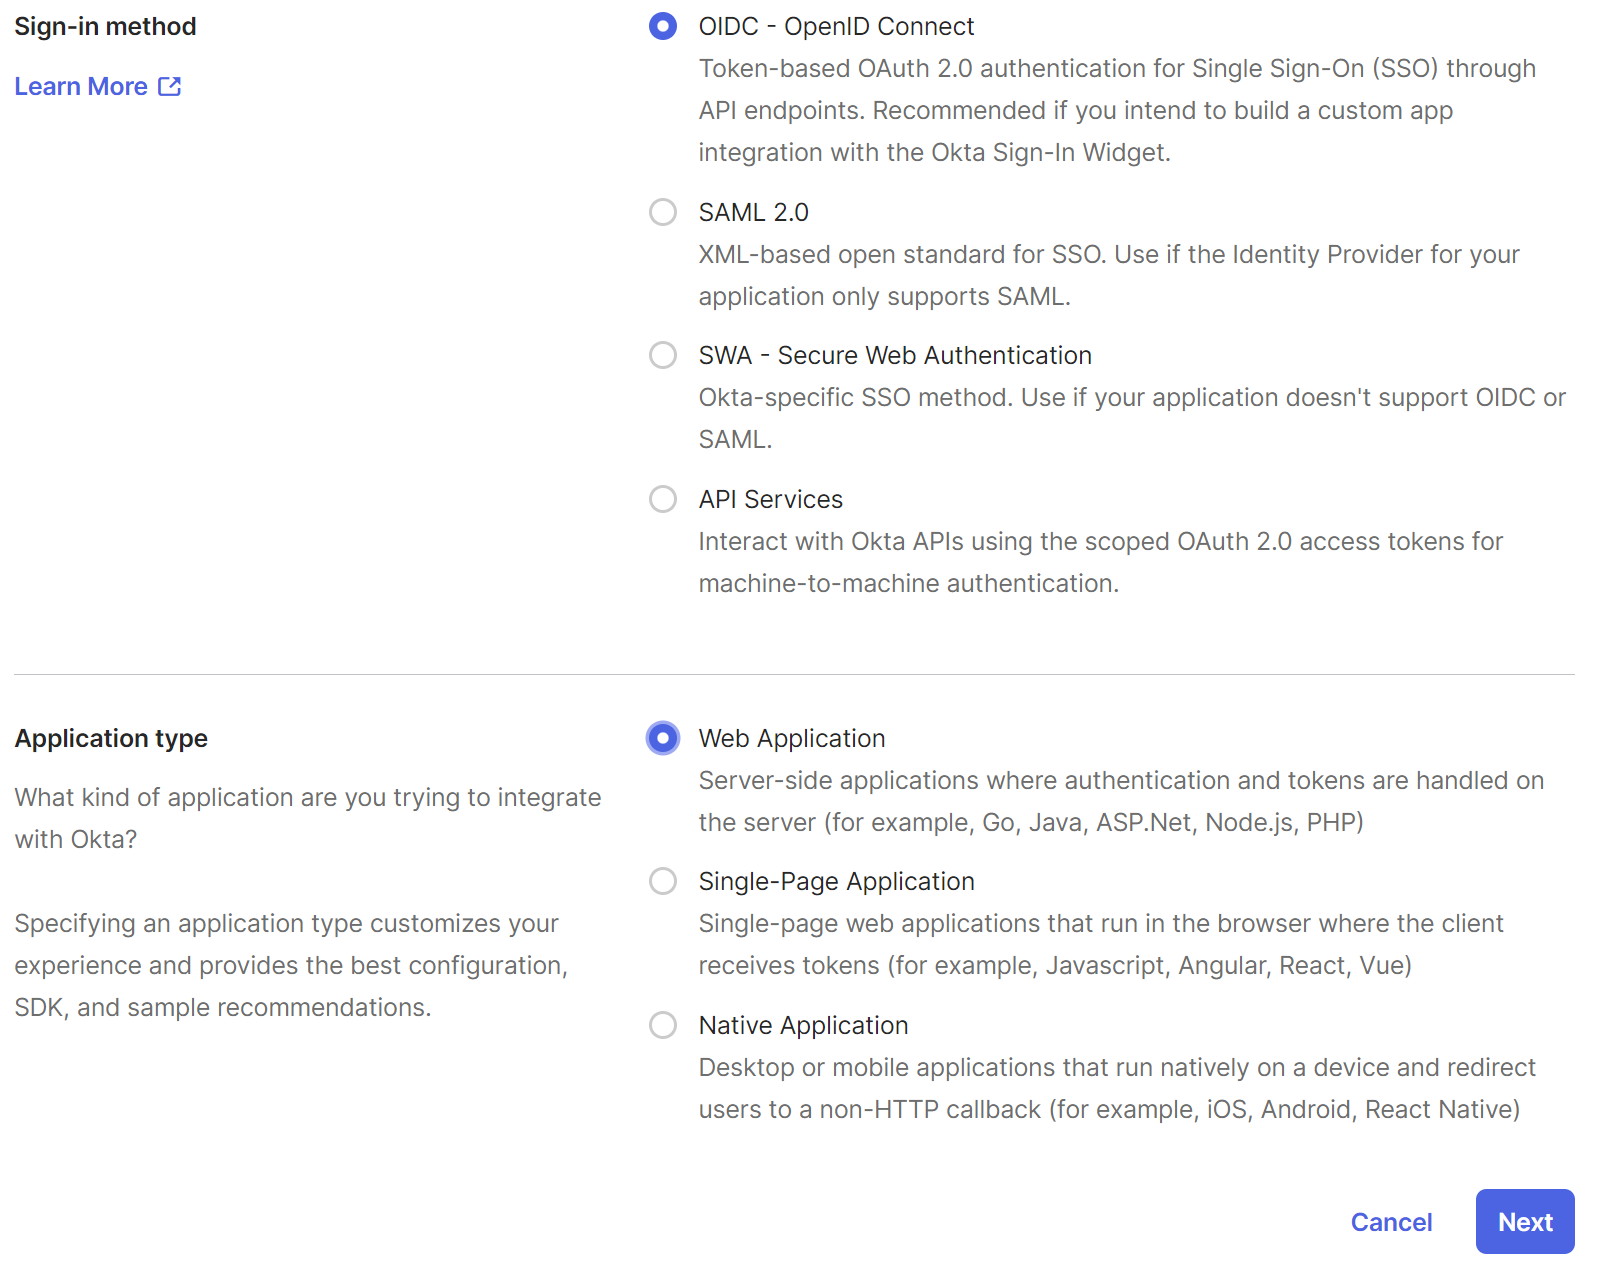

https://<my-domain>.okta.com/). Here’s how to get the Client ID and Client Secret:
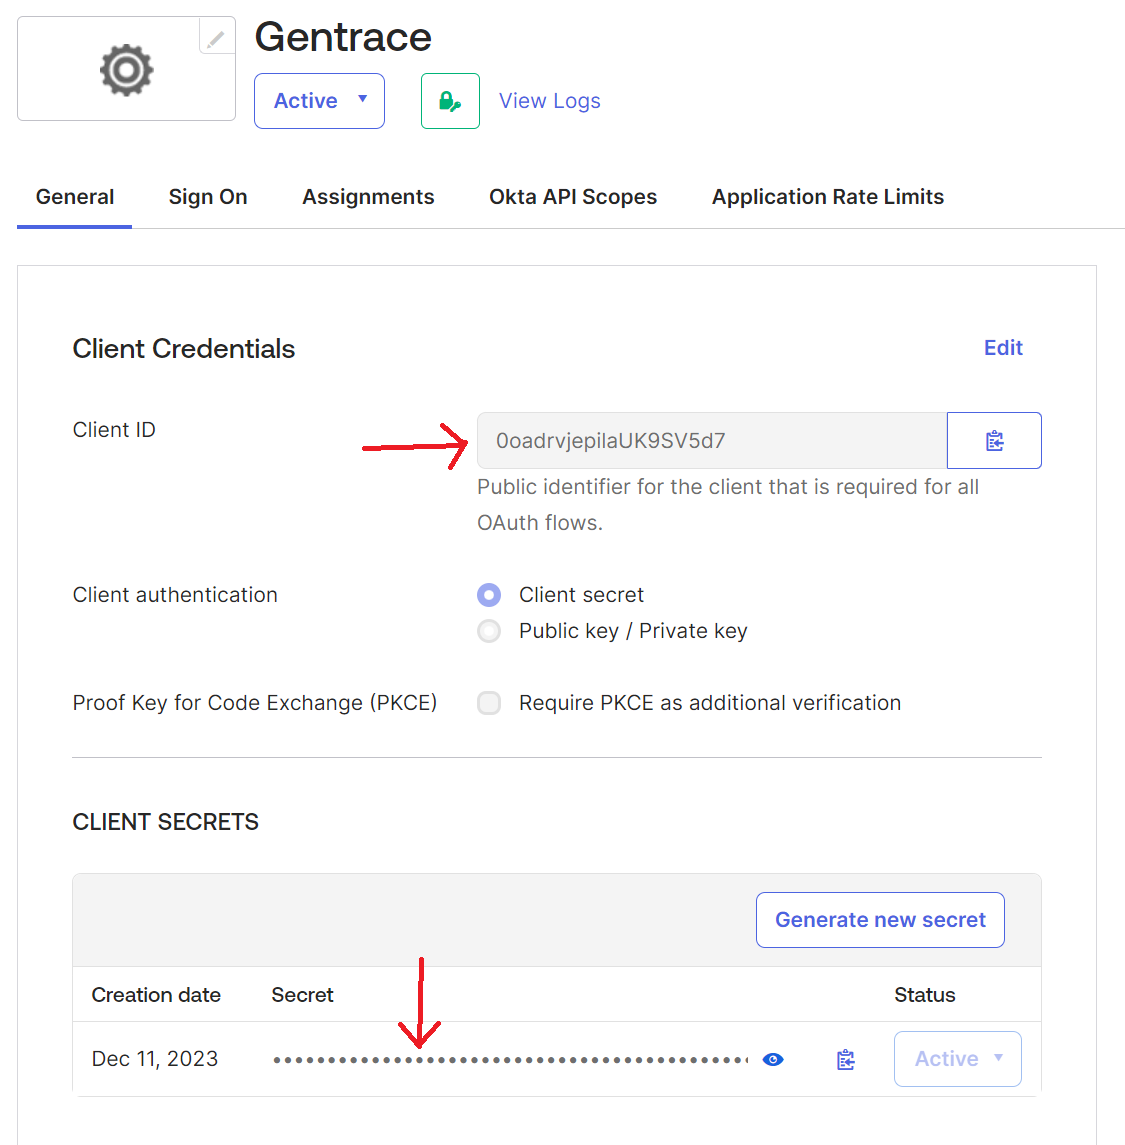
Step 2: Claim and verify your domain
In order to use Gentrace SSO, claim an email domain and verify your ownership of it. Press “Claim domain” and then enter your domain (eg gentrace.ai) and press “claim.” Then, press “verify.” You’ll see instructions on how to verify your domain. You’ll need to add a TXT record to your DNS provider.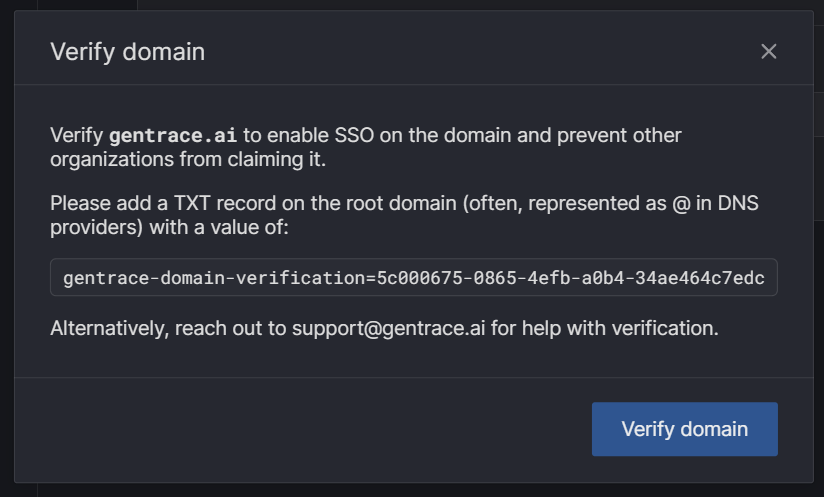
Please get in touch at support@gentrace.ai if you are having trouble
verifying your domain.
Step 3: Enable SSO
You can now enable SSO by pressing the “Enable” button.